
English 

No. 39 Tangning Road, Yunhe Street, Linping District, Hangzhou City, Zhejiang Province
Views: 0 Author: Site Editor Publish Time: 2026-01-31 Origin: Site


A Canvas Water Tank Welder seals seams on flexible water tanks.
It joins coated fabrics used for bladders, pillow tanks, cube tanks.
We see it in factories, repair shops, field service teams.
It rarely means cotton canvas. It usually means technical textile.
They use a woven base. A plastic coating sits on top.
It lets heat fuse seams. It also keeps water inside.
HF/RF welding: electric field heating. Great for long production seams.
Hot air / hot wedge: heated air or wedge melts coatings. Portable options exist.
Extrusion welding: adds molten plastic bead. More common on thick rigid plastics.
Fast cycle time. Good repeatability. Easy for long straight lines.
Clean seams. No glue cure time. Less odor risk.
Strong fusion on compatible coatings. It holds under pressure tests.
One machine rarely fits every fabric. Material drives results, not marketing.
People ask for “maximum welding thickness.” They often mean different things.
We need three numbers. It helps every setup conversation.
Base sheet thickness: one layer of coated fabric.
Seam stack thickness: overlap seam. Usually two layers.
Reinforced stack thickness: patches, hems, flanges. Often three to six layers.
Weld width equals the seal band width. Electrode or roller sets it.
Weld thickness equals the stack height at the seam area.
They connect, yet they are not the same.
Base sheet thickness × number of layers = seam stack thickness
Add reinforcement layers = reinforced stack thickness
| Seam area | Typical layers | Why it matters |
|---|---|---|
| Standard overlap seam | 2 layers | Most welders handle this easiest |
| Folded hem seam | 3–4 layers | More mass. Needs slower speed or more energy |
| Outlet flange reinforcement | 4–6 layers | Hardest zone. Most leaks start here |
Material decides everything. It decides heat response and bond strength.
“Canvas water tank” usually means coated fabric, not bare textile.
PVC coated polyester: popular, welds well using HF or hot air.
PU coated fabric: can weld, yet it needs careful tuning.
TPU film laminates: used on premium bladders. Hot wedge works well.
HF/RF works best on “polar” plastics. PVC often qualifies. Some PU grades do too.
Non-polar plastics heat poorly under RF energy. Results feel weak or inconsistent.
Coating type: PVC, PU, TPU, other.
Coating thickness: thin coat needs gentle energy control.
Fabric weave: tighter weave resists stretch. It helps seam stability.
Additives: flame retardant, anti-static, pigment. They can shift weld windows.
Surface condition: dust, oil, release agent. They kill fusion fast.
Ask suppliers for a weldability note. It saves days of guessing.
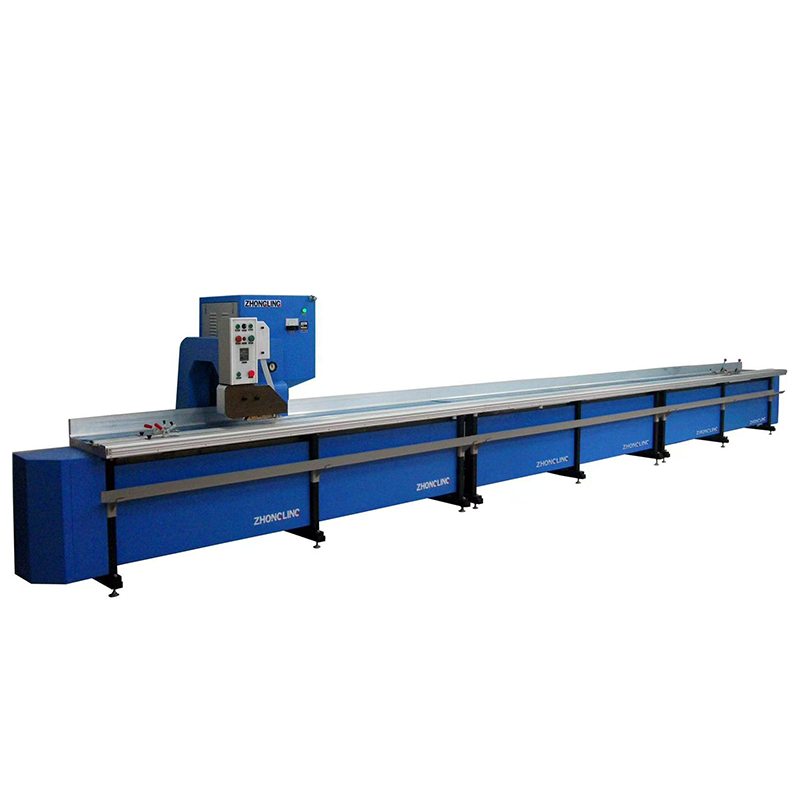
KOTIN machines often target coated fabrics for industrial seam work.
Many models use HF continuous welding. It suits long tank seams.
Power rating: more energy headroom for thicker stacks.
Weld speed range: slower speed increases heating time.
Weld width range: wider band spreads stress. It also needs more energy.
Pressure control: steady squeeze helps fusion across the full band.
They help you balance heat, time, pressure. We tune those three first.
When stack thickness climbs, we slow speed. We increase pressure a little.
We widen the band only when needed. Wide bands cost energy.
Browse models on KOTIN Products.
There is no single number. It depends on method, material, seam stack.
So we treat it as a range. Then we confirm via test coupons.
| Welding method | Best match materials | Common practical thickness focus | Where it struggles |
|---|---|---|---|
| HF/RF continuous welding | PVC coated fabric, some PU grades | Thin-to-medium sheet stacks; overlap seams run best | Very thick reinforcement stacks; poor RF-response coatings |
| Hot air / hot wedge welding | PVC, TPU, many thermoplastic films | Wide working range; good on seams and repairs | Windy field work; hard-to-reach corners on big tanks |
| Extrusion welding | Rigid thermoplastics; thick plastic parts | Thicker sections; bead adds material | Coated textiles; flexible fabric seams |
Heat penetration: thick stacks need more time, more energy.
Pressure uniformity: uneven squeeze leaves cold zones.
Seam design: overlap plus patches create huge stack jumps.
Line speed: faster travel reduces heating time.
Moisture and dirt: they block fusion, even on thin stacks.
A fabric may look thin. The seam area may be four layers.
Corner zones add patches. Outlet zones add flanges and rings.
So we count layers first. We measure stack height next.
| Zone | Build | Layer count | Typical weld approach |
|---|---|---|---|
| Main body seam | Overlap seam | 2 | Normal speed, standard band width |
| Hem edge | Folded edge plus overlap | 3–4 | Slower speed, slightly higher pressure |
| Outlet patch | Patch plus flange reinforcement | 4–6 | Slowest speed, staged weld steps, wider band if needed |
Ask “How many layers at the seam?” Then ask “Which coating?” It works.
If you guess thickness, you tune settings blind. It wastes rolls of fabric. It also wastes time. We measure it first, then we weld. It feels slower. It saves days.
Digital calipers: quick checks, good for base sheet.
Micrometer: more precise, better for thin coatings.
Thickness gauge: best for textiles. It controls pressure.
Sample cutter: gives clean edges for repeatable readings.
Main body fabric area. Keep it away from printed logos.
Overlap seam area. Stack two layers as the seam will run.
Reinforcement zones. Patch + base + hem. Measure the real stack.
Near corners and outlets. Thickness jumps live there.
Cut a 50 mm x 50 mm coupon. Keep edges clean.
Measure base sheet thickness. Record it three times.
Stack two layers. Compress lightly. Measure seam stack thickness.
Add patch layers. Measure reinforced stack thickness.
Write all numbers. Add notes about coating type, texture, finish.
| Material / Coating | Base Thickness (mm) | 2-Layer Stack (mm) | Reinforced Stack (mm) | Notes |
|---|---|---|---|---|
| PVC coated fabric | __ | __ | __ | Texture / FR / color / supplier |
| PU coated fabric | __ | __ | __ | Finish / stretch / batch date |
Seam design decides the stack. Stack decides energy needs. It is simple. A machine may weld your main seam easily. It may struggle at outlet patches. So we design seams for weldability.
Two layers overlap. The welder fuses the coating across a band. It is strong. It is fast. It also tolerates small alignment errors.
Edges touch, no overlap. It looks neat. It needs backing tape. It also needs perfect alignment. Many shops avoid it for tanks.
It adds layers fast. It also adds strength. Weld settings need more time. We often slow speed here.
Overlap seam:     [====] overlap [====]
Butt seam:        [====][====] + backing strip
Folded hem seam:  [==fold==][==overlap==]
Inlet and outlet flange patches
Corner gussets and corner pads
Handle straps and tie-down loops
Label patches and protective wear strips
| Feature | What it adds | Typical layer jump | Best strategy |
|---|---|---|---|
| Outlet patch | Patch + reinforcement ring | +2 to +4 layers | Staged weld passes, slower speed |
| Corner pad | Extra wear protection | +1 to +3 layers | Tapered patch edges, avoid sudden steps |
| Folded hem | Stronger edge | +1 to +2 layers | Use wider band, add pressure carefully |
We can’t “force” thick stacks using one knob. It takes balance. We tune power, time, pressure. We watch seam behavior. We adjust one change at a time.
Power: more energy. It helps thicker stacks fuse through.
Dwell time: longer heating time. It boosts penetration.
Pressure: better contact. It removes air gaps.
Weld band width: wider band spreads load. It needs more energy.
Line speed: slower speed means more heating time per centimeter.
| Material | Stack Type | Band Width | Line Speed | Pressure Feel | What to watch |
|---|---|---|---|---|---|
| PVC coated fabric | 2 layers (main seam) | 20–30 mm | Medium | Firm, even | Clean bead edge, no peel |
| PVC coated fabric | 4+ layers (patch) | 30–40 mm | Slow | Firm, stable | Fusion at edges, no channels |
| PU coated fabric | 2 layers | 20–30 mm | Slow-medium | Moderate | Surface gloss change, no scorching |
Fresh seams feel soft. They need a moment to cool. If you pull too early, it distorts. If you stack too soon, it prints marks. So we let it rest flat. We keep tension low. We handle it gently.
Measure → Cut coupons → Set baseline → Weld test → Cool → Peel test → Adjust
Settings look fine until you test. A seam can look smooth yet peel easily. We test it every time we change material, batch, reinforcement layout.
Even seal band width. No thin spots.
No burn marks. No bubbling. No heavy wrinkles.
Edges fused fully. No dry “channels” near the border.
Peel test: pull the layers apart. It should resist and tear fabric before peel.
Shear test: pull along the seam direction. It should hold steady.
Fill-and-hold: fill the tank, wait, check seams and patches.
Segment test: test outlet zones first. They fail first.
Soap check: low-pressure air + soap for bubble detection.
| Test | What it finds | Pass sign | Fail sign |
|---|---|---|---|
| Peel test | Fusion strength | Fabric tears before seam peels | Seam peels cleanly |
| Fill-and-hold | Real leakage | Dry seams after hold time | Damp line, drops at corners |
| Soap test | Micro-channels | No bubbles | Bubble line along edge |
Defects tell a story. We read it. Then we adjust. It beats random guessing.
Stack too thick for current settings
Speed too fast
Pressure uneven, air gaps exist
Too much energy for that stack
Speed too slow on thin zones
Pressure too high on soft coatings
Band width too narrow for the load
Edge fusion incomplete
Patch step too abrupt
Contamination, moisture, metal dust near electrodes
Uneven pressure or gap
Worn electrode surfaces
| Symptom | Likely cause | Fast fix |
|---|---|---|
| Peels easily | Not enough penetration | Slow speed, increase dwell slightly |
| Scorch marks | Too much heat | Increase speed, reduce power |
| Leaks at patch edge | Incomplete edge fusion | Wider band, staged weld |
Some tanks push seam stacks high. Outlet zones get bulky. Corner pads get thick. If you design heavy reinforcements, plan a welding strategy early.
Long straight seams on PVC coated fabrics
High production volume
Consistent overlap joints
Mixed materials, films, field repairs
Curves and complex patch shapes
Lower power availability on site
Use tapered patch edges. It reduces step height.
Split thick patches into two stages. It reduces peak stack thickness.
Move straps away from main seam. It keeps seams simpler.
Full patch (thick) → replace using two thinner patches
Big jump becomes two small jumps
Weld becomes easier, leaks reduce
Water tanks hold real water. People drink it sometimes. So we treat seams like food-contact surfaces. We avoid messy adhesives. We keep the work area clean. We also keep operators safe.
Use clean gloves. Keep fabric off dirty floors.
Wipe seams before welding. Dust blocks fusion.
Use approved materials for potable water use, when required.
Guard moving rollers. Pinch points exist.
Keep hands off hot zones. Burns happen fast.
Keep the RF area organized. No metal scraps near electrodes.
Ventilate the space. Heated coatings can smell strong.
No. Material thickness is one layer. Welding thickness means seam stack thickness. Overlap seams double it. Reinforced zones multiply it. So we measure the seam area, not the roll label.
It depends on coating type, layer count, band width, speed. Many machines handle two-layer seams easily. Thick patch stacks may need slower runs or staged welds. Test coupons tell the truth.
It can be a cold weld. Heat did not penetrate fully. Speed may be too fast. Pressure may be uneven. Contamination may block fusion. Reduce speed a bit. Increase dwell slightly. Clean surfaces first.
HF/RF excels on compatible coatings and long seams. Hot-air can handle mixed films and repairs. Thick reinforcement stacks often need staged steps no matter the method. Design helps more than brute force.
Wider bands spread stress and reduce edge channels. They also need more energy. Start around 20–30 mm on main seams. Move wider on patch zones. Confirm using peel and leak tests.
Use a fill-and-hold test. Focus on patches and corners first. Add a soap bubble test for micro-leaks. If it passes both, you can trust it more.
Welding thickness for a Canvas Water Tank Welder depends on material, seam stack, settings. We measure first. We test coupons next. Then we lock a stable process. It feels simple once you do it twice.
If you want related equipment, check the High Frequency Continuous Welding Machine category.
Building storage products too? Browse PVC Water Tank options, then compare seam stack zones.
Need a second model for tent-style production? See the High Frequency Continuous Tent Water Tank Welder.


